Blog · Voice & dubbing
How to Add a Voiceover to a Video in VoxStudio with One Drag
Write or dub a voiceover in VoxStudio, then drag the session from the video editor's Sessions panel onto the timeline. The voiceover lands on its own track, with subtitles included.
By David, Product Specialist at VoxStudio · · 4 min read
Key takeaways
- Create the voiceover in VoxStudio Voiceover: write or paste the script, pick a voice and generate.
- In the video editor, open the Sessions tab and drag the dub session onto the timeline.
- The voiceover lands on its own audio track where you drop it, with the session subtitles included.
- Lower or mute the original audio if the voiceover replaces it.
Narration, a translated voiceover, a product walkthrough read by a consistent voice: these used to mean exporting audio from one tool and lining it up by hand in another. In VoxStudio for Mac, the voiceover you generate is a session, and sessions can be dragged straight into the video editor.
Here is the whole workflow on a real project, a short "Make Your Own Lemonade" clip.
The workflow
Three steps, one drag.
Voiceover: Drag a voiceover session onto the timeline
Start from a voiceover or dub session you created in VoxStudio. One drag brings in the generated audio and its subtitles.
Best for: Scripts you wrote, translated or dubbed in VoxStudio Voiceover. Result: A new audio track with the voiceover, plus the session subtitles on the timeline.
Create the voiceover session
In Voiceover, write or paste the script, choose a voice and generate. When the session shows Ready it can be used in any video project.
Open the Sessions tab in the video editor
In your project, switch the left panel from Library to Sessions. Dub sessions are marked Dub; you can search or filter the list.
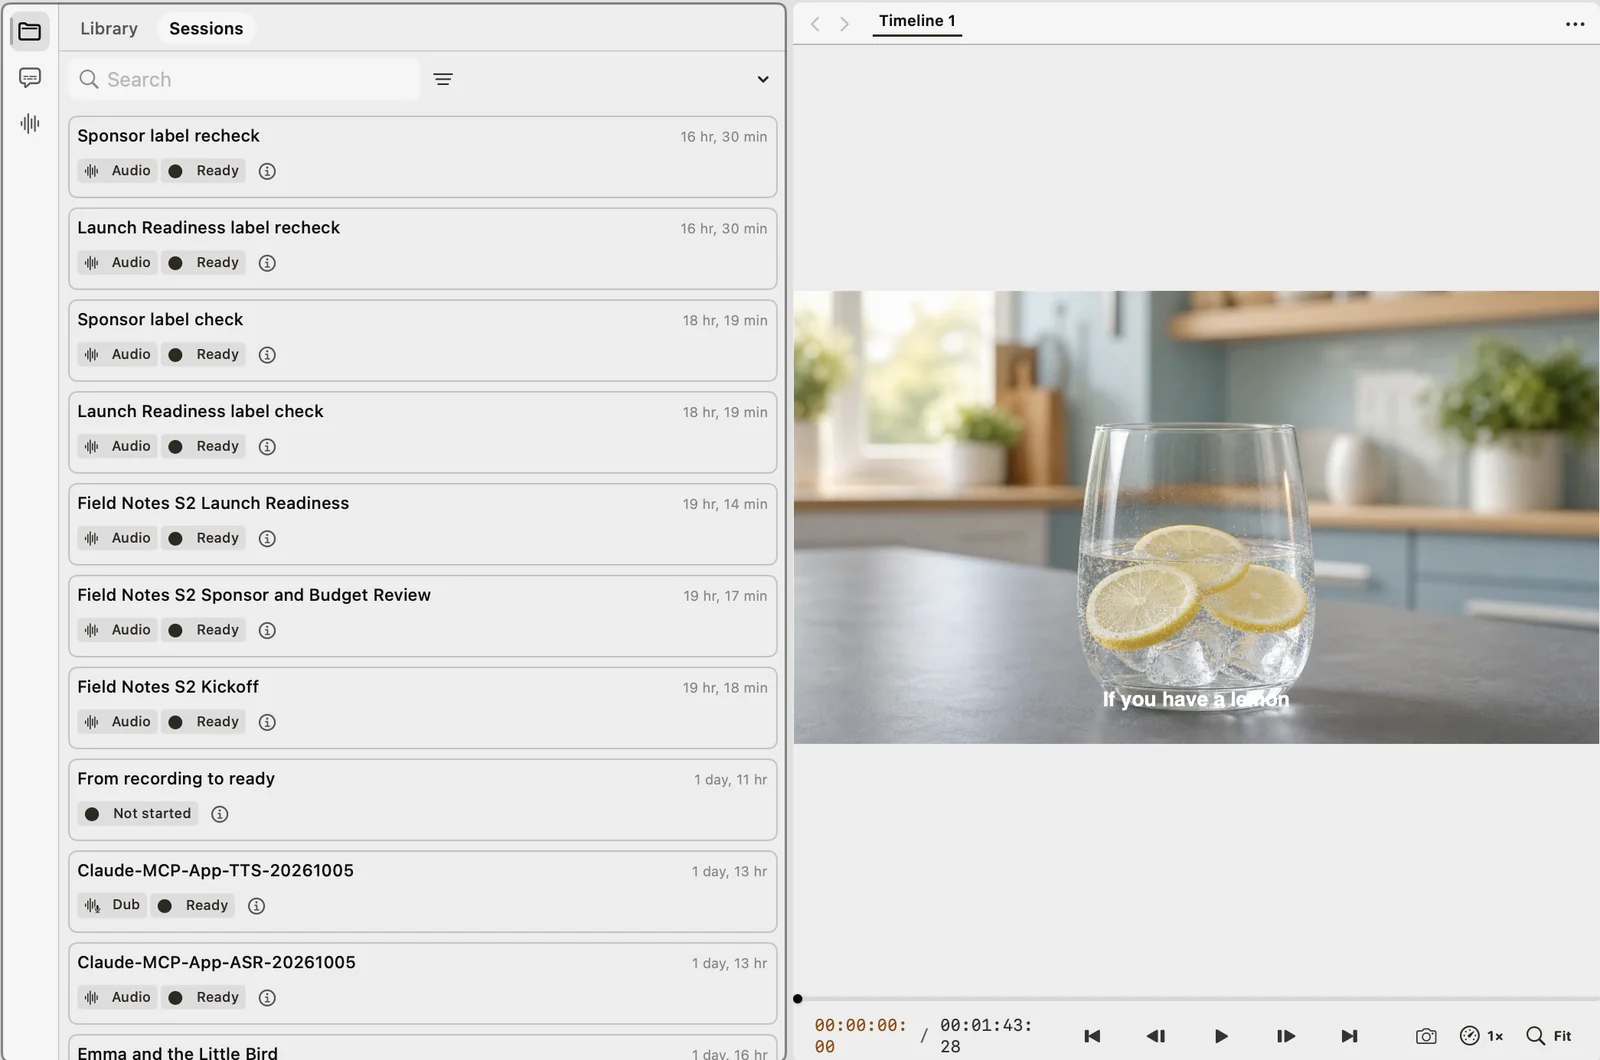
The Sessions tab sits next to Library in the left panel of the video editor. Drag the session to the timeline
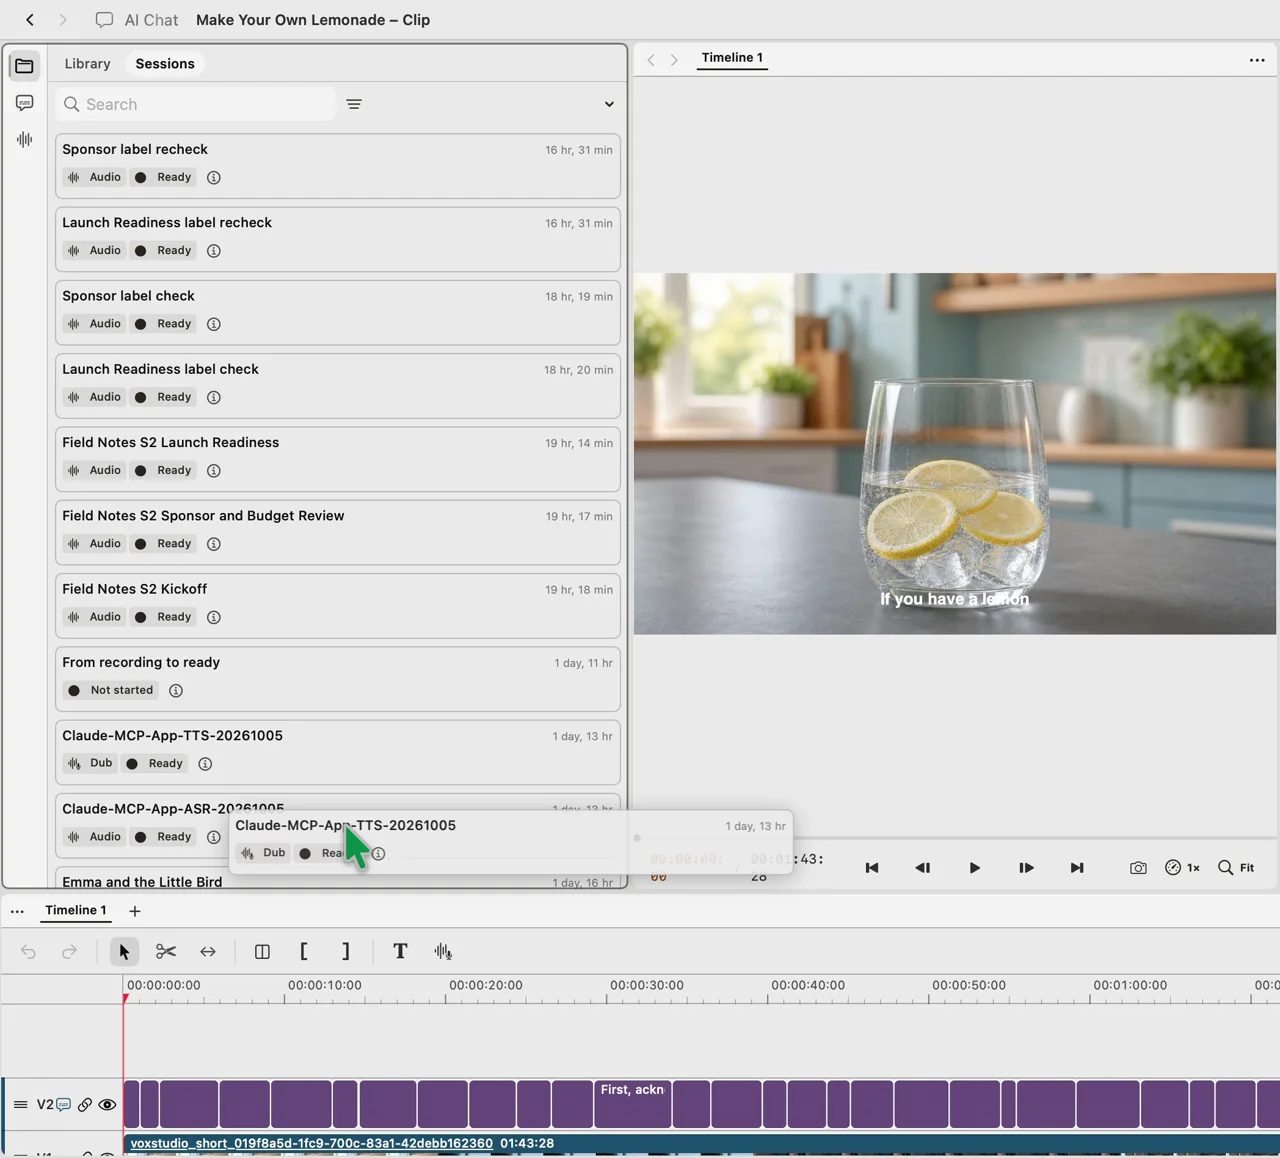
Drag the session card and drop it where the voiceover should start. VoxStudio adds a new audio track for it and brings the subtitles along, so you do not need to transcribe the voiceover.

After the drop, the voiceover lands on its own track (D2) at the position you chose.
Screen recording: dragging a dub session from Sessions into the timeline.
Tips from daily editing
- Drop where the line starts — Drop the session exactly where the narration should begin; you can still nudge the whole track later.
- Mute the original when dubbing — If the voiceover replaces the original speech, lower or mute the original audio track so viewers only hear the new voice.
- Regenerate, then drag again — Changed the script or voice? Generate a new revision in Voiceover and drag it in again; the old track stays until you remove it.
- Captions come along — The voiceover subtitles arrive with the drag. For audio recorded elsewhere, see the captions guide.
FAQ
How do I add a voiceover to a video in VoxStudio?
Create a voiceover session in VoxStudio Voiceover, open your project in the video editor, switch the left panel to Sessions and drag the session onto the timeline. The voiceover is added as a new audio track along with its subtitles.
Does the voiceover come with subtitles?
Yes. Dragging a voiceover or dub session onto the timeline brings its subtitles too, so there is no extra transcription step.
Where does the voiceover land on the timeline?
On a new audio track, starting where you drop it. You can move or trim it afterwards like any other clip.
Give your next video a voice
VoxStudio for Mac includes voiceover, dubbing and the video editor in one app. Download VoxStudio for Mac
David — David works on the VoxStudio product team and spends most days inside the video editor, turning real customer workflows into faster ones.