Blog · Productivity
Record It Once: Screen Recording to Transcript to Shareable Clip on Mac
Skip the meeting: record a walkthrough of your screen in VoxStudio for Mac, get a searchable transcript and summary, then use New clip to turn the key moment into a captioned clip your team will actually watch.
By David, Product Specialist at VoxStudio · · 6 min read
Key takeaways
- Record a 2-minute walkthrough instead of booking a 30-minute meeting. VoxStudio captures a display, an app, a window, a region, a mobile device or audio only.
- When you stop, trim the start and end, name the session and click Transcribe. The recording becomes a transcript with speakers, timestamps and a summary.
- Click New clip to open the recording in the video editor with the transcript already on a subtitle track, then cut the moment that matters.
- Your teammates get a short captioned clip and searchable text, instead of a long video nobody finishes.
The problem with "I'll just record a video"
Recording a quick walkthrough instead of booking a meeting is one of the best habits a remote team can have. Product managers explain a new page, designers walk through a prototype, engineers show a bug, customer success teams record a demo for a client who could not make the call.
The trouble starts after you hit stop. A 12-minute video gets watched once, at 2x, by half the people it was meant for. Nobody can search it. The one sentence that matters — "this is the line for our launch post" — is buried at minute 9. And if you want to post just that moment in Slack, you need another app.
In VoxStudio for Mac, recording, transcription and clipping are one flow. Here is how I use it to replace a weekly product sync with a walkthrough of our Mac page.
From recording to clip in one flow
Seven steps, all in the same app, with no export and re-import in between.
Record → Transcribe → Clip: Record once, share the part that matters
Capture your screen and voice, let VoxStudio transcribe it on your Mac, then turn the key moment into a captioned clip.
Best for: Async walkthroughs, demos, bug reports, lecture snippets and feedback videos. Result: A searchable transcript and summary, plus a short captioned clip ready to export.
Start from Record and transcribe
Open Create and choose Record and transcribe ("Capture your voice or screen, then turn it into an editable transcript"). You can also reach it from Transcribe → Record.
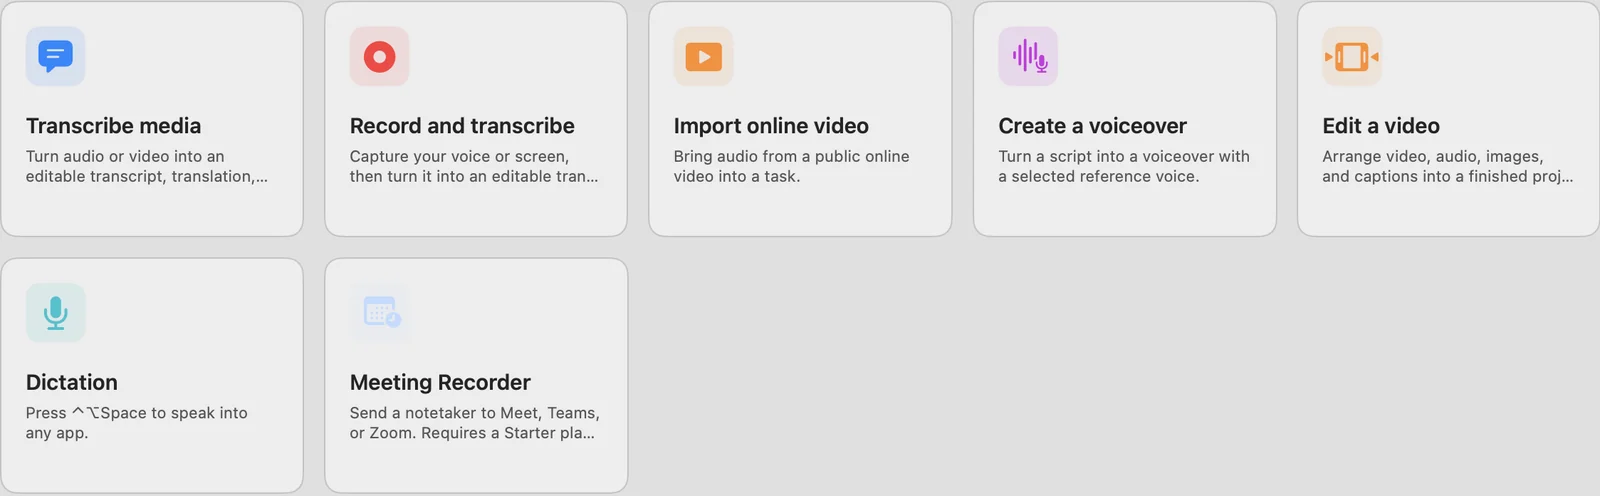
Record and transcribe sits next to the other ways to bring media in. Choose what to capture
Pick Audio, Display, App, Window, Region or Mobile Device. For a walkthrough of one browser tab, Window keeps notifications and other apps out of the video. Set resolution, frame rate and quality, choose your microphone, and tick System audio if the screen plays sound.
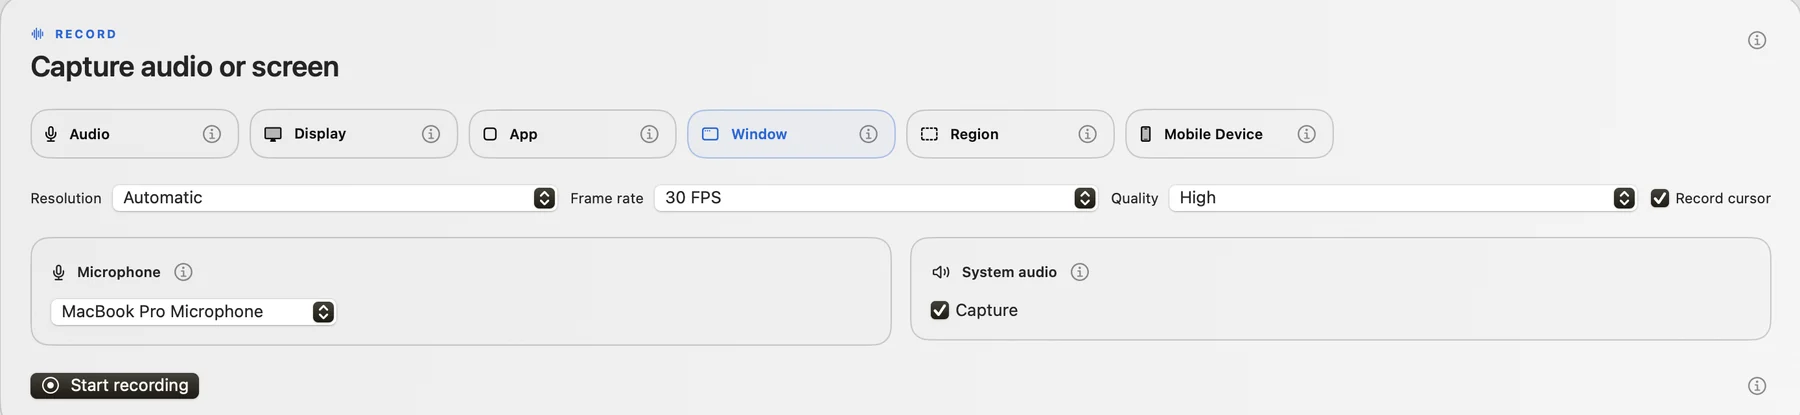
One panel for source, quality, microphone and system audio. Talk through it
Click Start recording and pick the window. A small floating bar shows the timer and a live level meter, with pause, microphone and stop. Scroll, click and explain as you would in a meeting.
The floating bar stays out of the way while you present. Trim before processing
When you stop, the recording opens in a preview. Drag the yellow handles to cut the "is this recording?" start and the fumbling end, or keep the full recording and continue.
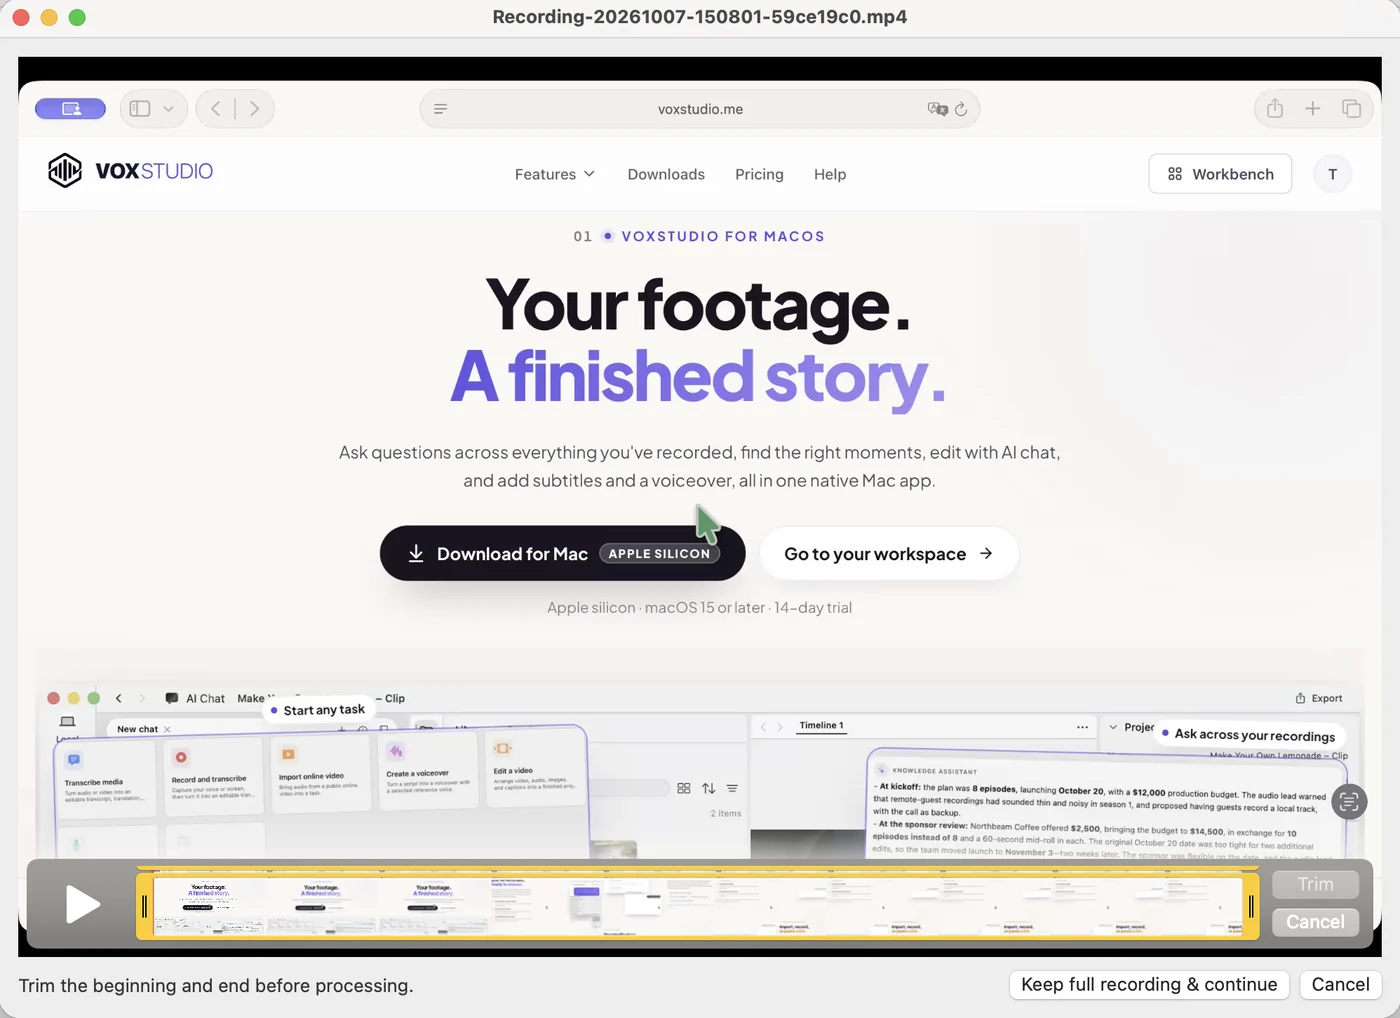
Trim the beginning and end before anything is processed. Name it and transcribe
Give the session a title you will search for later — or leave it blank to auto-generate — keep Input language on Auto detect, and click Transcribe. Leave Process with VoxStudio Cloud unticked to transcribe on your Mac.
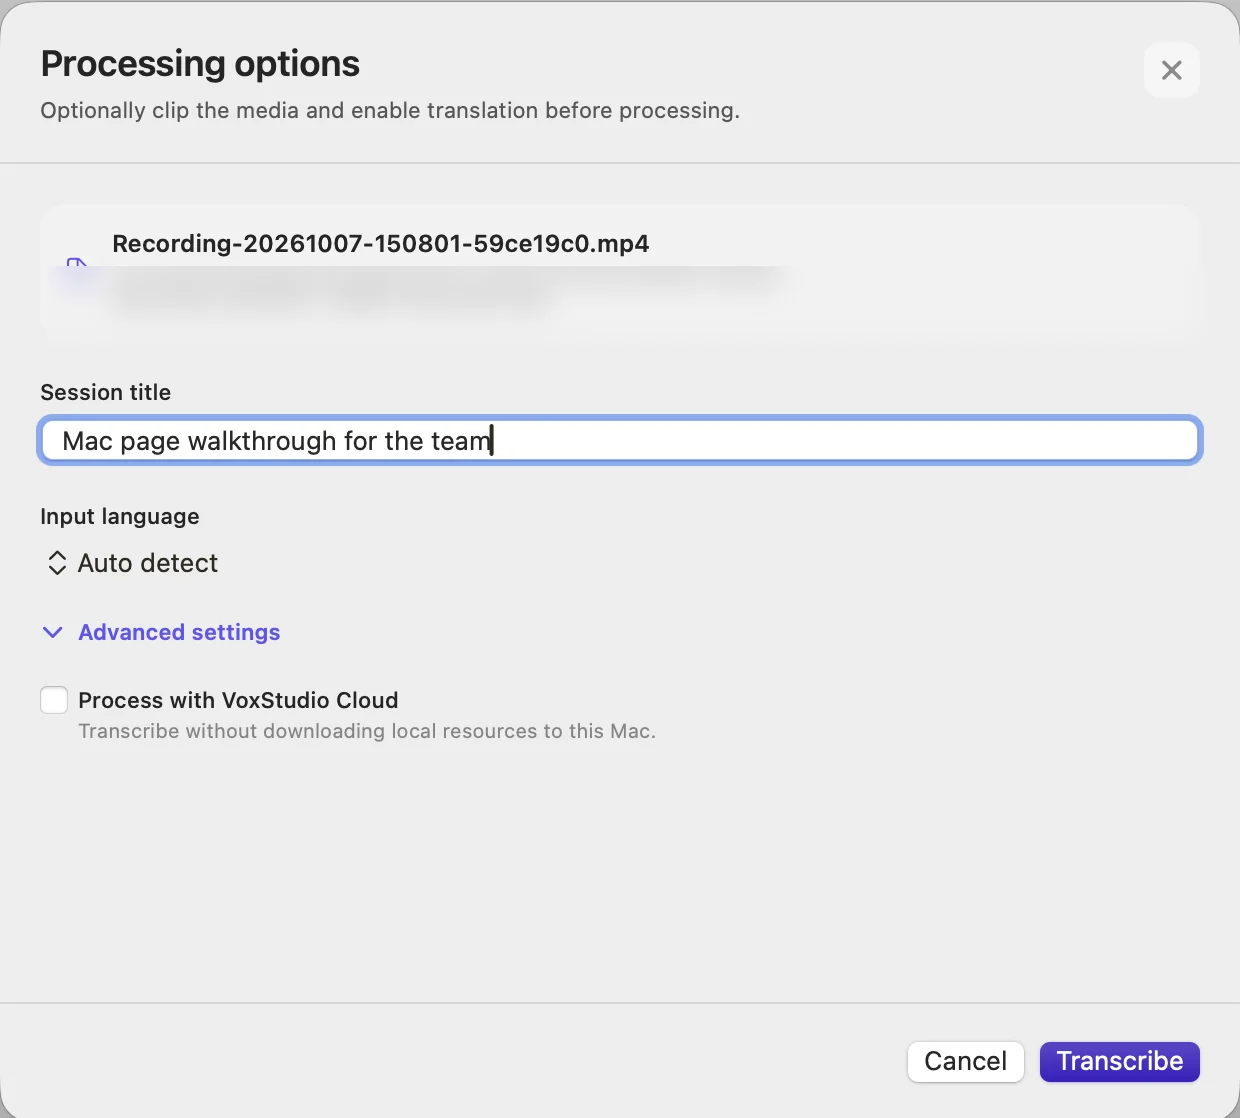
A clear title makes the recording easy to find in search and in the knowledge base. Read, search and summarize
The session workspace shows the waveform player, a summary with key points and decisions, and a transcript split by speaker with timestamps. Click any paragraph to play from there. The example below is a sponsor and budget review call, recorded the same way.
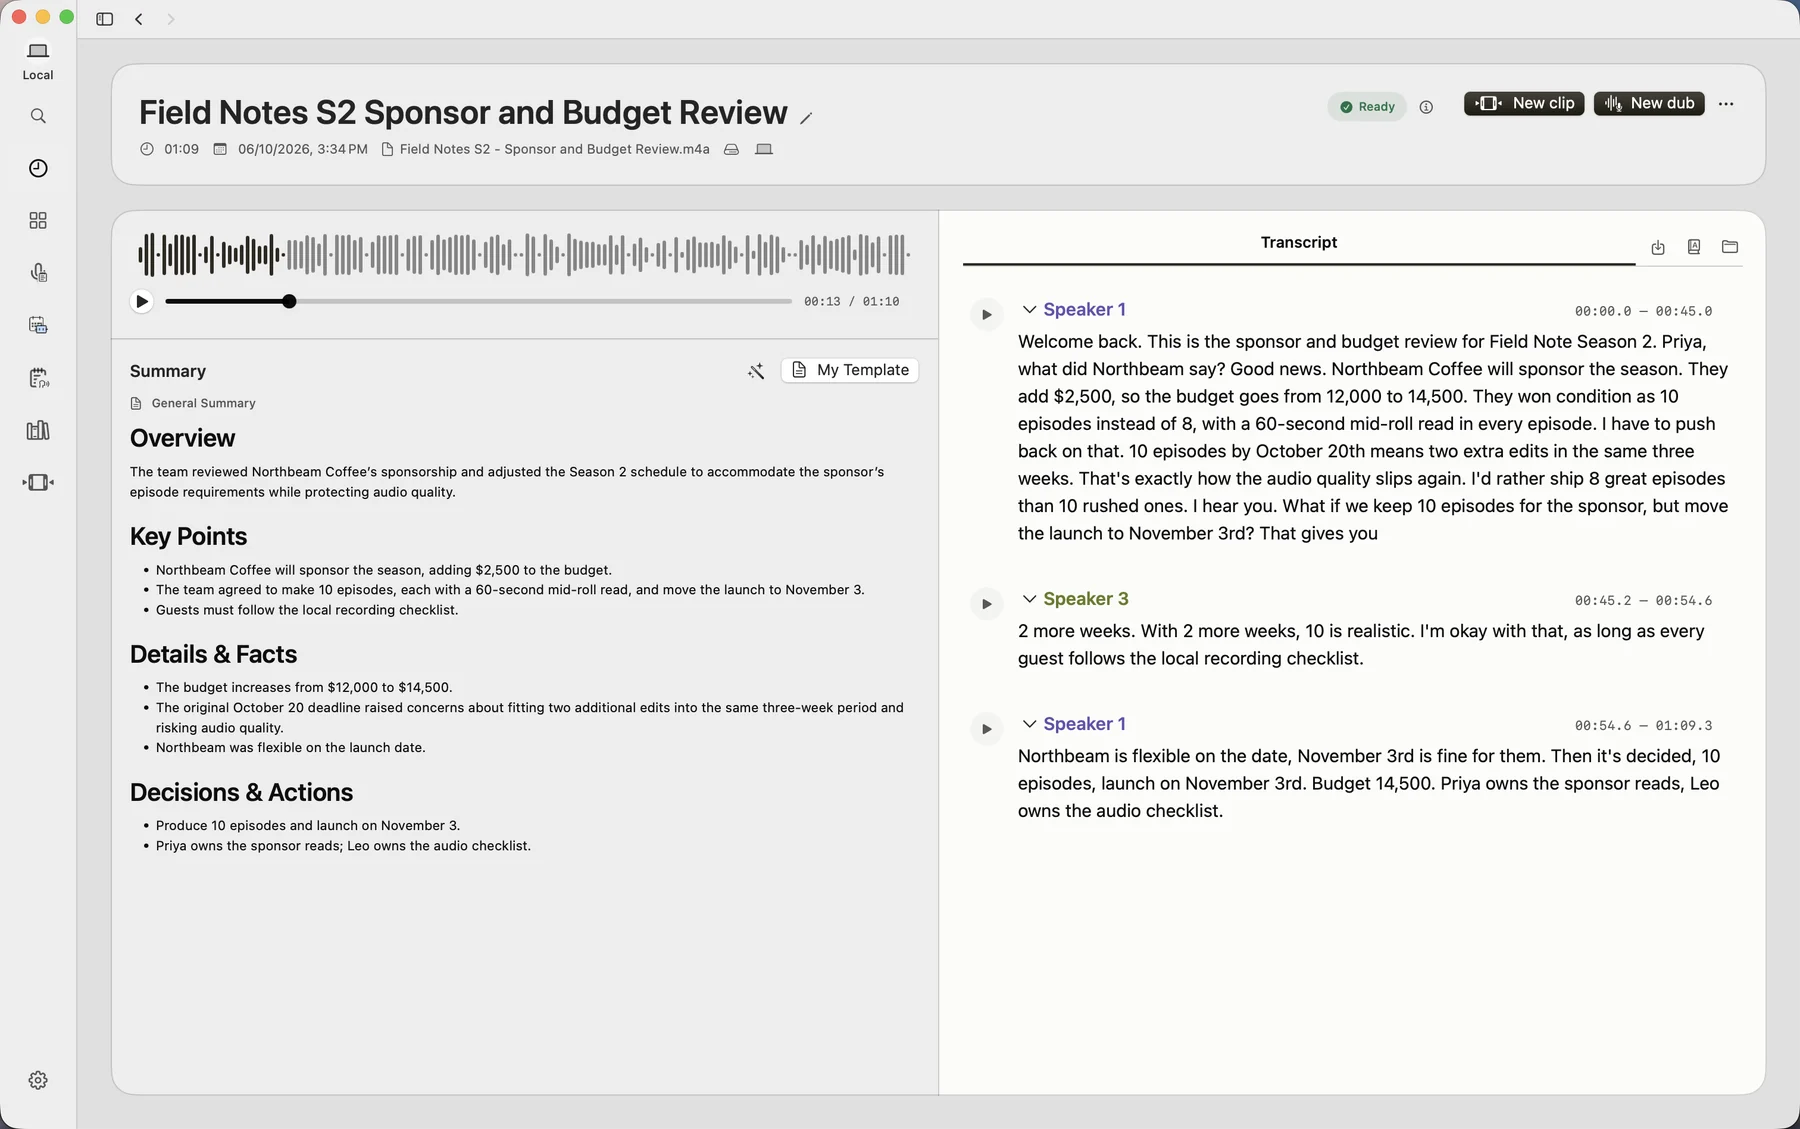
Every recording lands in the same workspace: summary on the left, transcript on the right. Click New clip to cut the key moment
New clip opens the recording in the video editor as a new project. The transcript is already on a subtitle track, one caption per phrase, above the media. Find the sentence that matters, cut around it, style the captions and export a short clip for Slack, email or social.
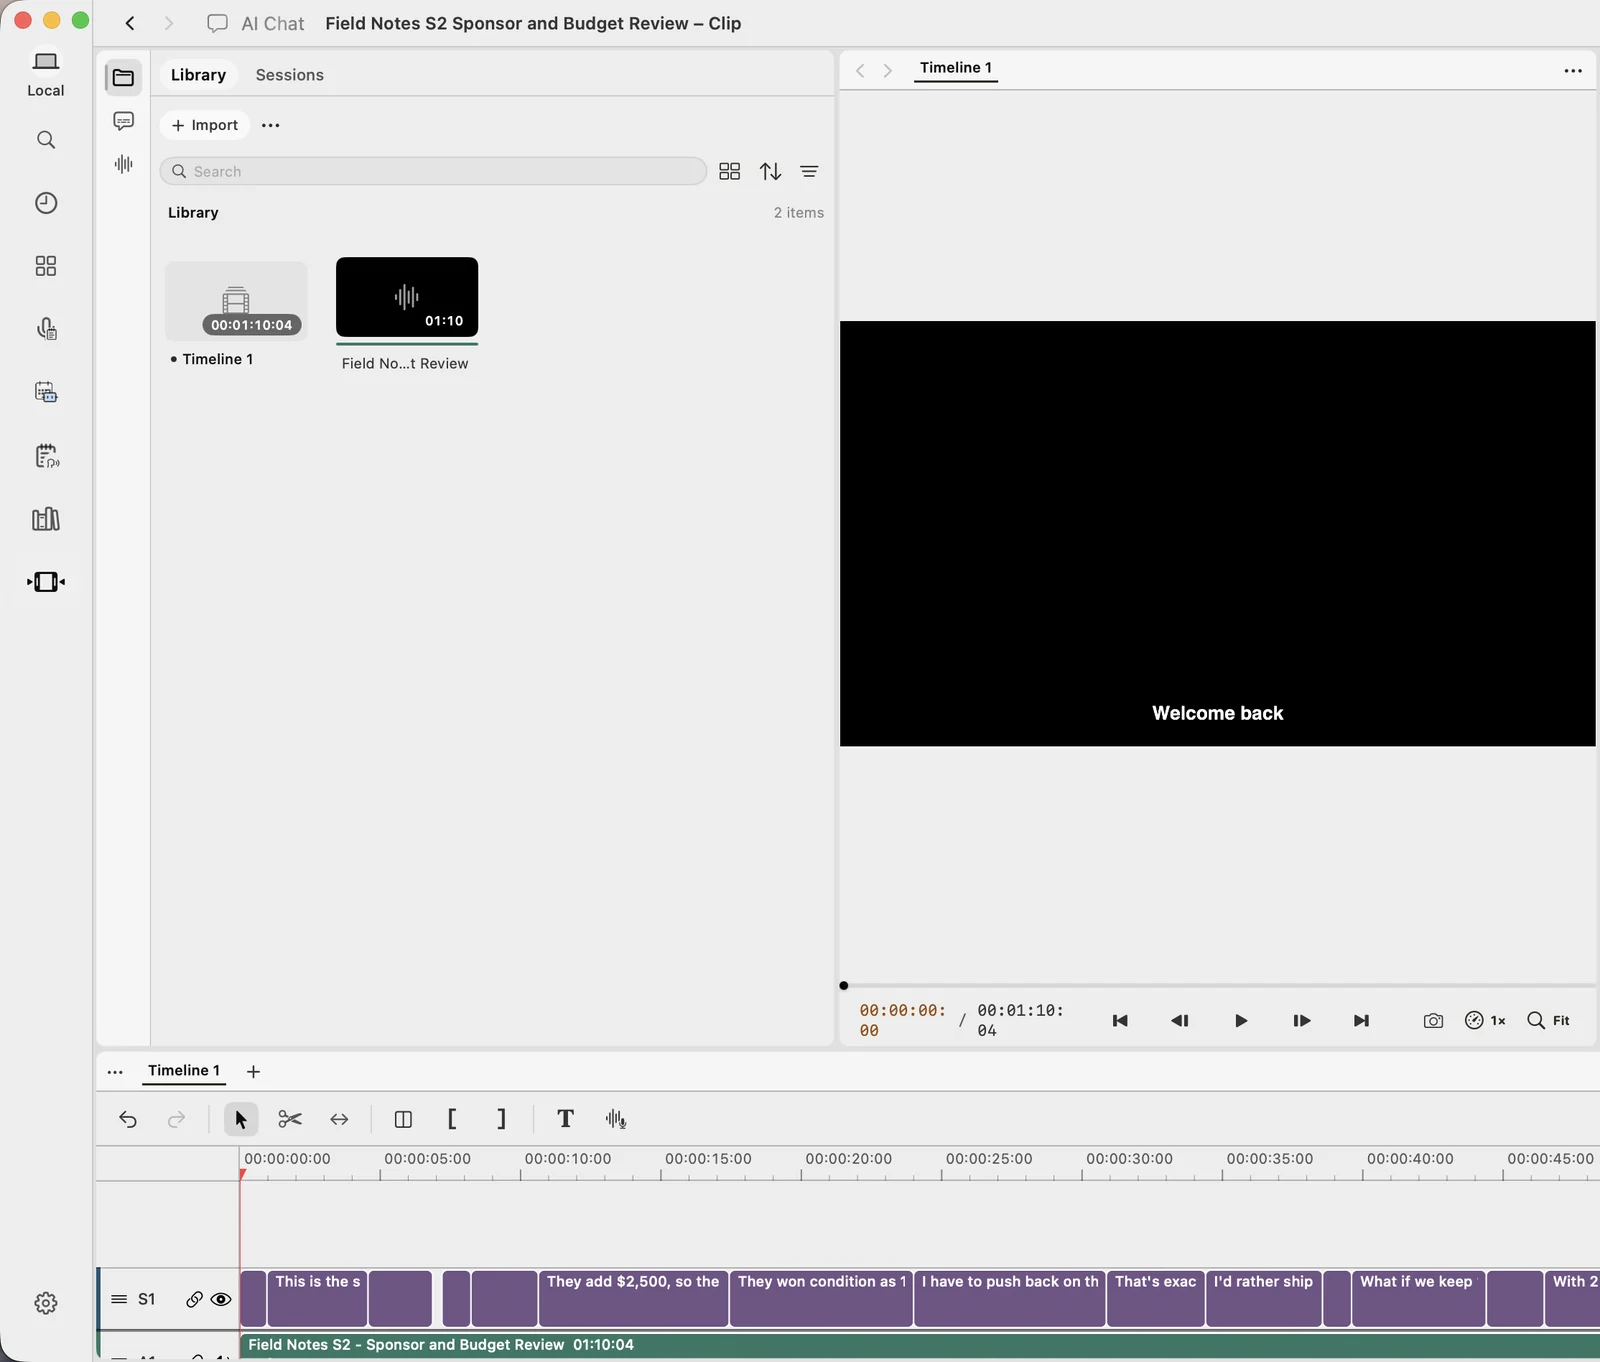
New clip: the recording and its subtitles, ready to cut.
Which capture mode should you use?
| Use it for | Good to know | |
|---|---|---|
| Window | A walkthrough of one app window, like a browser tab or a design file | Other windows and notifications stay out of the recording |
| Display | Demos that move between several apps | Records everything on that screen |
| App | Every window of one app | Handy when the app opens dialogs or new windows |
| Region | A focused area, such as a chart or a form | Smaller files, tighter framing |
| Mobile Device | Showing an iPhone or iPad app | Connect the device to your Mac first |
| Audio | Voice notes, calls and interviews | No video, just microphone and system audio |
Tips from recording every week
- Keep your microphone on when you narrate — System audio captures what the screen plays; your own voice comes from the microphone. If the transcript comes back empty, check that the microphone was not set to Off.
- Say the headline out loud — Start with one sentence like "Here is the change and what I need from you." It becomes the first line of the transcript and the easiest clip to share.
- Title it like a search query — "Mac page walkthrough for the team" beats "Recording 14". You will find it later in search, and the knowledge assistant can cite it.
- Clip, don't forward — Send the 30-second clip with captions and link the full session for anyone who wants the rest.
FAQ
How do I record my screen and get a transcript on Mac?
In VoxStudio for Mac, open Create → Record and transcribe, choose Display, App, Window, Region, Mobile Device or Audio, and click Start recording. When you stop, trim if needed, name the session and click Transcribe. The recording opens as a session with a transcript and summary.
Can I record just one window?
Yes. Choose Window, click Start recording and pick the window to share. Other apps and notifications are not recorded.
Can I trim a recording before it is transcribed?
Yes. When you stop recording, a preview opens where you can trim the beginning and end, or keep the full recording and continue.
How do I turn part of a recording into a clip?
Open the session and click New clip. VoxStudio opens the recording in the video editor with its transcript on a subtitle track, so you can cut the moment you need, style the captions and export.
Is the recording transcribed on my Mac?
By default, yes. Process with VoxStudio Cloud is optional and off unless you tick it in Processing options.
Replace your next status meeting with a 2-minute recording
VoxStudio for Mac records, transcribes and clips in one app, with recordings stored on your Mac. Download VoxStudio for Mac
David — David works on the VoxStudio product team and spends most days inside the video editor, turning real customer workflows into faster ones.