Blog · Productivity
Record, Transcribe, Dub and Edit on Your Mac: A Local-First Studio in One App
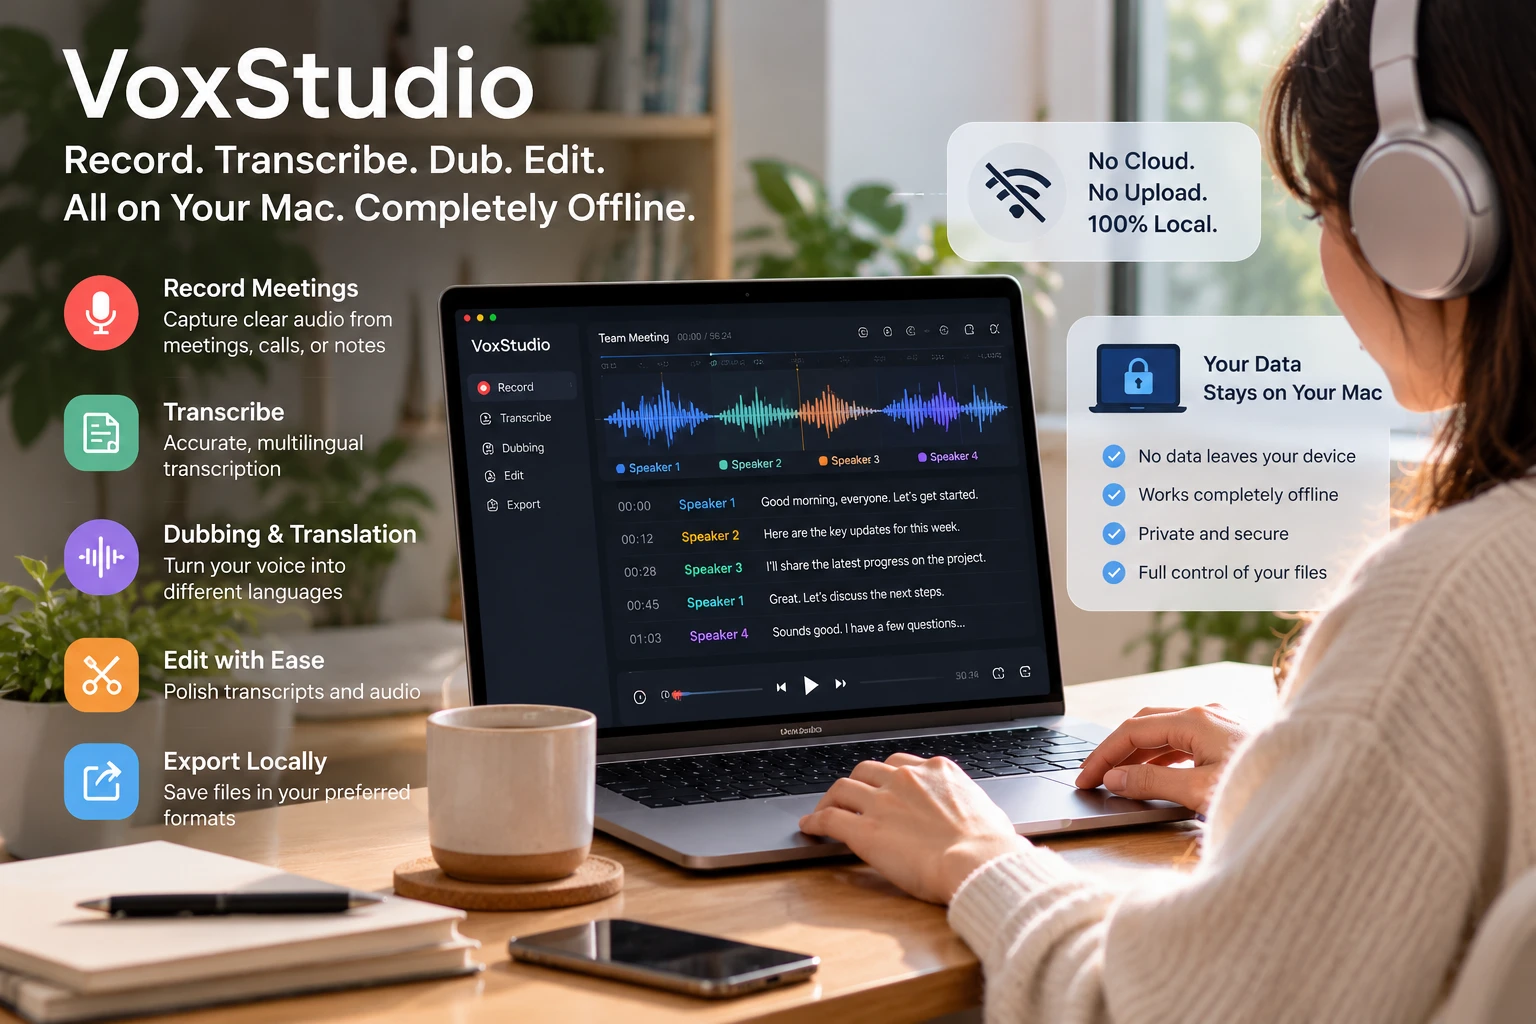
VoxStudio for Mac keeps recording, transcription, speaker detection, voice dubbing and video editing in one native app, and runs the heavy lifting on your Mac after a one-time model download. Here is the whole workflow, and exactly what stays local.
By David, Product Specialist at VoxStudio · · 7 min read
Key takeaways
- One native Mac app covers the whole chain: record a screen, app or microphone, transcribe with speaker labels, dub with a reference voice, edit on a timeline and export.
- Transcription, captions, speaker identification, voiceover dubbing, semantic search and audio cleanup can run on your Mac once you download the local models. Local processing does not upload your media.
- Some features are not local by design: translation, AI summaries and the AI editing chat use an AI service (VoxStudio's or your own provider key), and sign-in, trials and purchases need the internet.
- Everything lands in the same session, so a recording can become a transcript, a dub and a captioned clip without exporting and re-importing files between tools.
Four jobs, usually four different tools
Take a normal week of audio and video work. You record a call or a screen walkthrough in one app. You upload it to a transcription service to get text. You paste the script into a voice tool to make a narration or a translated version. Then you download every file and line it all up in a video editor. By Friday the project is spread across four apps, three downloads folders and at least one upload you would rather not have made.
VoxStudio for Mac puts those four jobs, record, transcribe, dub and edit, into one native app on Apple silicon. A recording becomes a session. The session holds the media, the transcript with speaker labels, any subtitles and any dubbed versions. From there you can open it in the video editor with the subtitles already on the timeline.
The part people ask about first is privacy, so this post is specific about it. The short version: the core work runs on your Mac. The longer version, including the few things that do not, is further down.
The workflow, from record to export
Five steps in one app. You can start at any of them: import a file you already have, or begin with a recording.
Record → Transcribe → Dub → Edit: From a raw recording to a finished, dubbed video
Capture the source, turn it into a speaker-aware transcript, create a voiceover or dub, then cut and export the video, all in the same session.
Best for: Meetings, interviews, walkthroughs, lectures and short videos you want to caption, translate or re-voice. Result: A searchable transcript with speakers, subtitles, an optional dubbed voiceover, and an exported video.
Download the local features you want
Open Settings → Local Features and prepare only what you will use: Transcription & Captions, Speaker identification, Dubbing, Search by meaning, Knowledge ranking and Audio enhancement. Each one shows Ready when its model is on your Mac. Approved downloads resume if you reopen the app, and you can remove any of them later to free space.
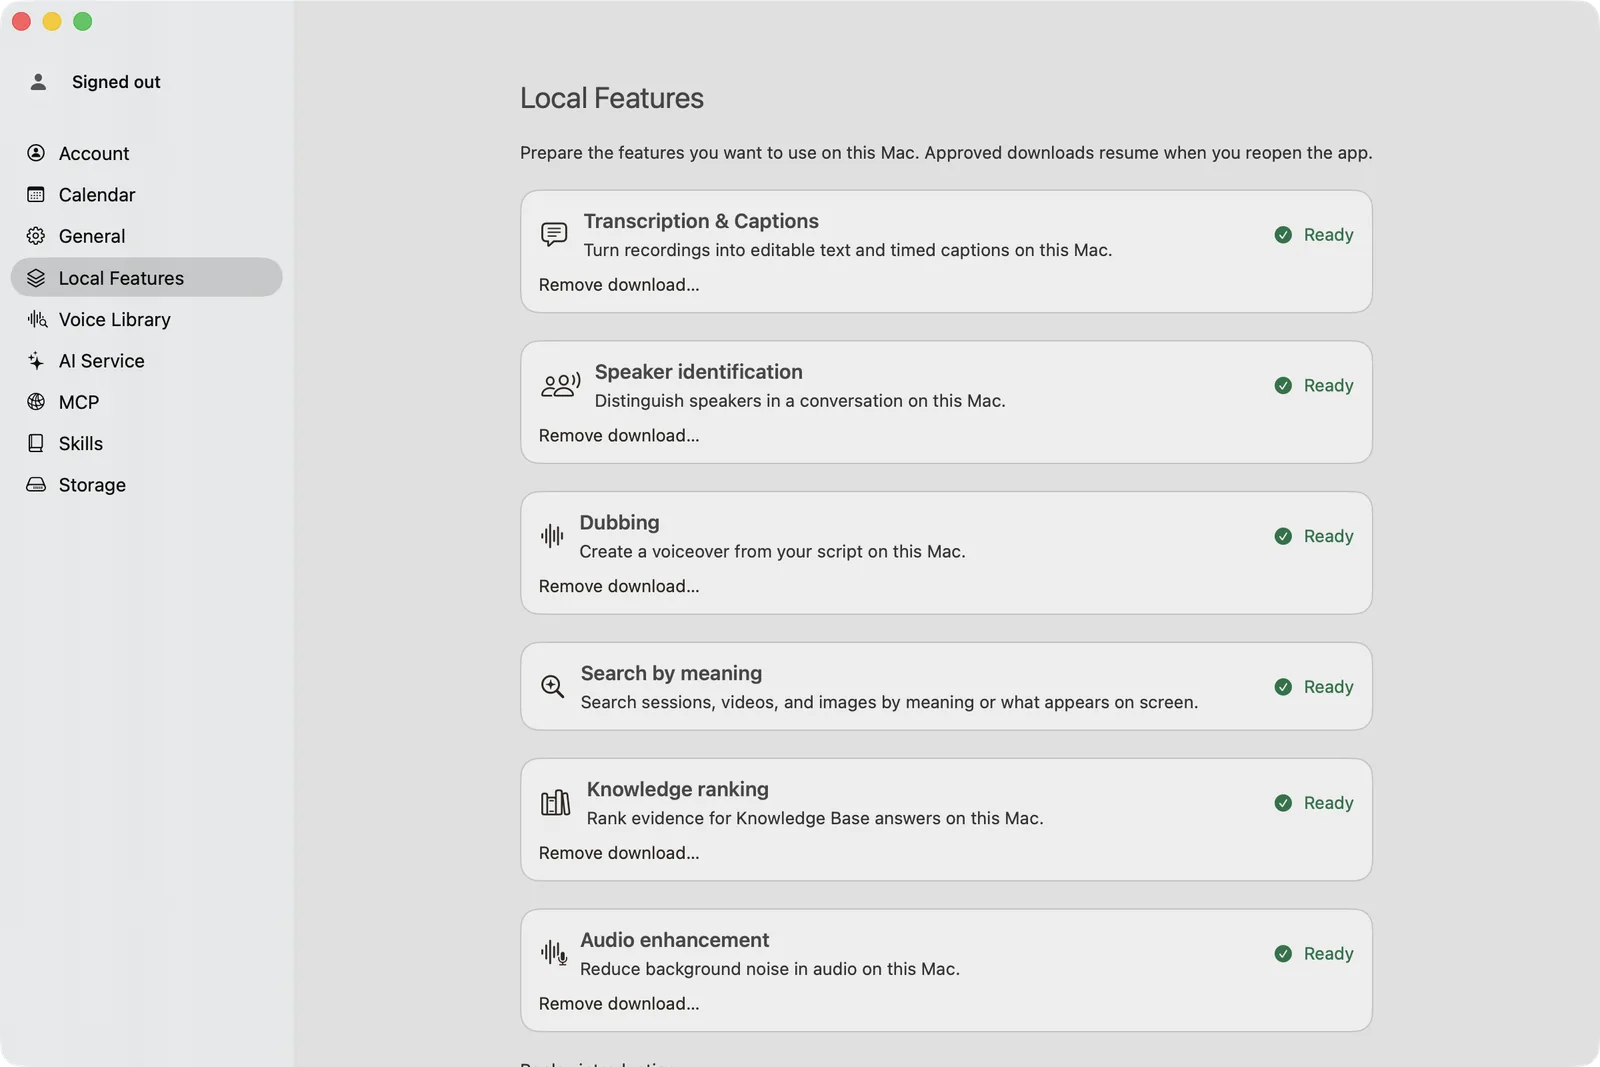
Local Features: each capability is a model you download once and can remove at any time. Record, or bring in what you already have
Under Transcribe, choose Import files, Net video or Record. Recording can capture a display, an app, a window, a region, a mobile device or audio only, with your microphone and system audio. For calls, the Meeting Recorder can record a meeting app such as Zoom without any bot joining.
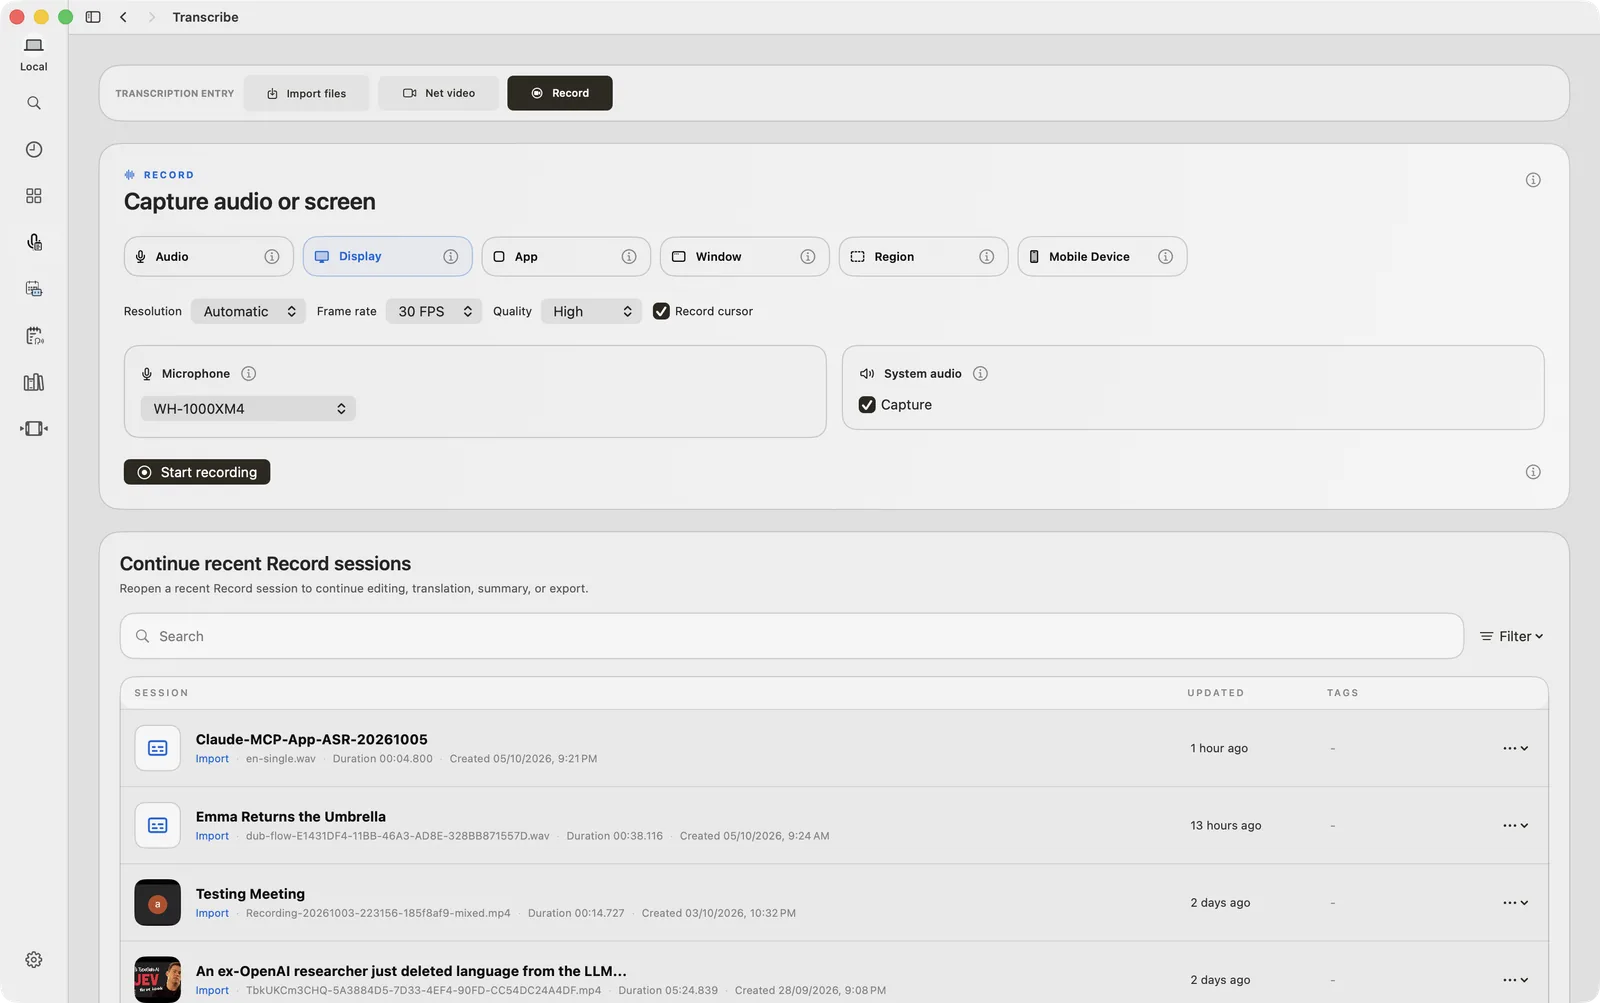
One panel for what to capture, the quality, your microphone and system audio. Transcribe with speakers and subtitles
The session workspace gives you a player, a timestamped transcript split by speaker, and subtitles you can edit. Click any paragraph to play from that moment. With the local models ready, transcription, captions and speaker identification run on this Mac. AI correction, translation and summaries add a language-model step on top.
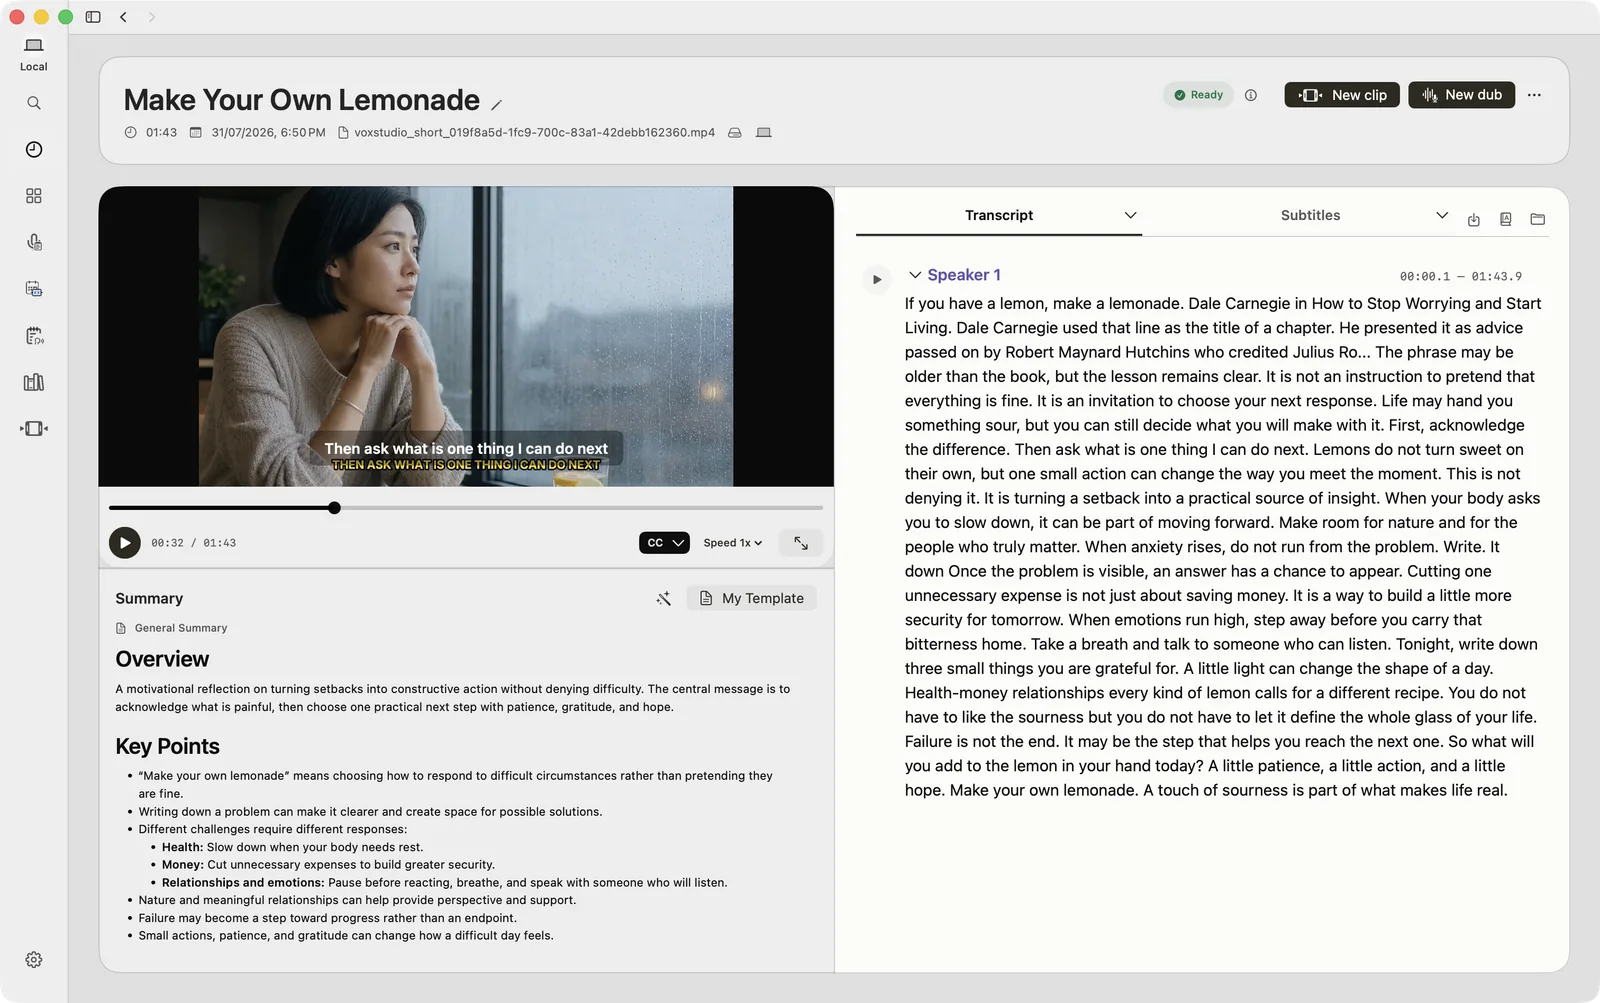
A session: player, summary and a transcript with speakers in one workspace. Dub it with a reference voice
New dub opens the voiceover builder. Pick the language, import the script from the transcript or write your own, choose a reference voice you have permission to use, and generate. Local dubbing creates the voiceover from your script on this Mac. Each segment can use a different voice.
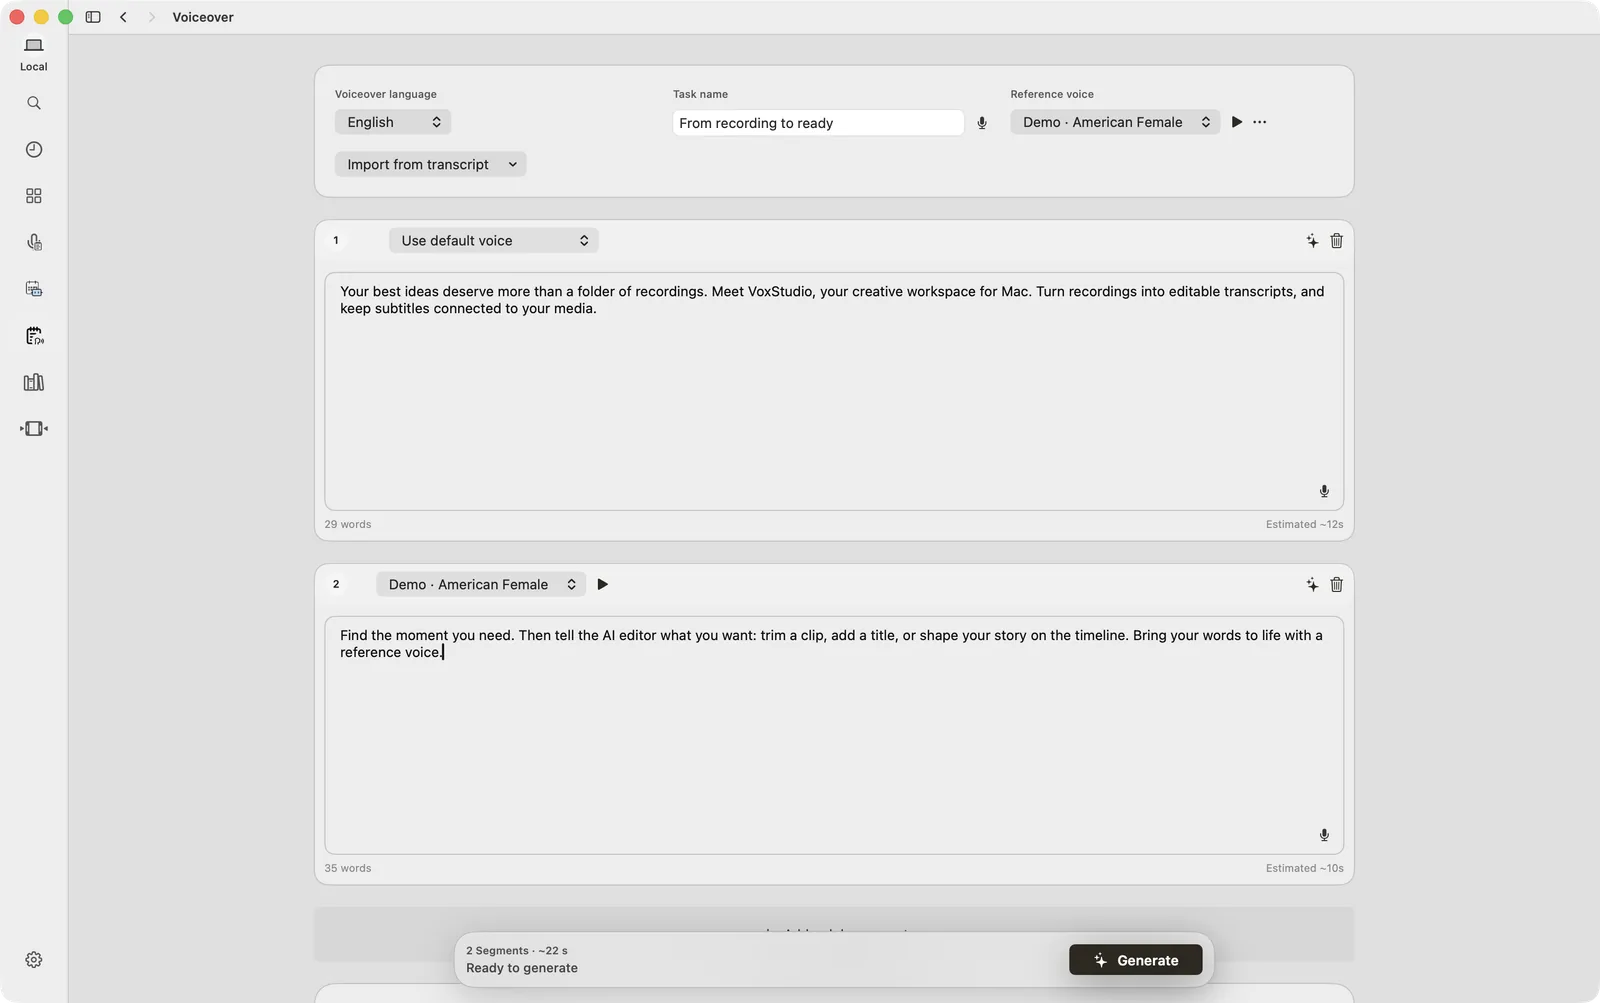
Voiceover builder: a script in segments, a reference voice, one Generate button. Edit on a timeline, with AI chat if you like
New clip opens the session in the video editor as a new project, with the transcript on a subtitle track. Cut, trim, add captions and effects, drag in your dub from the Sessions tab, and export. The AI chat can help with edits such as keeping the best takes or adding captions, and you review every change on the timeline.
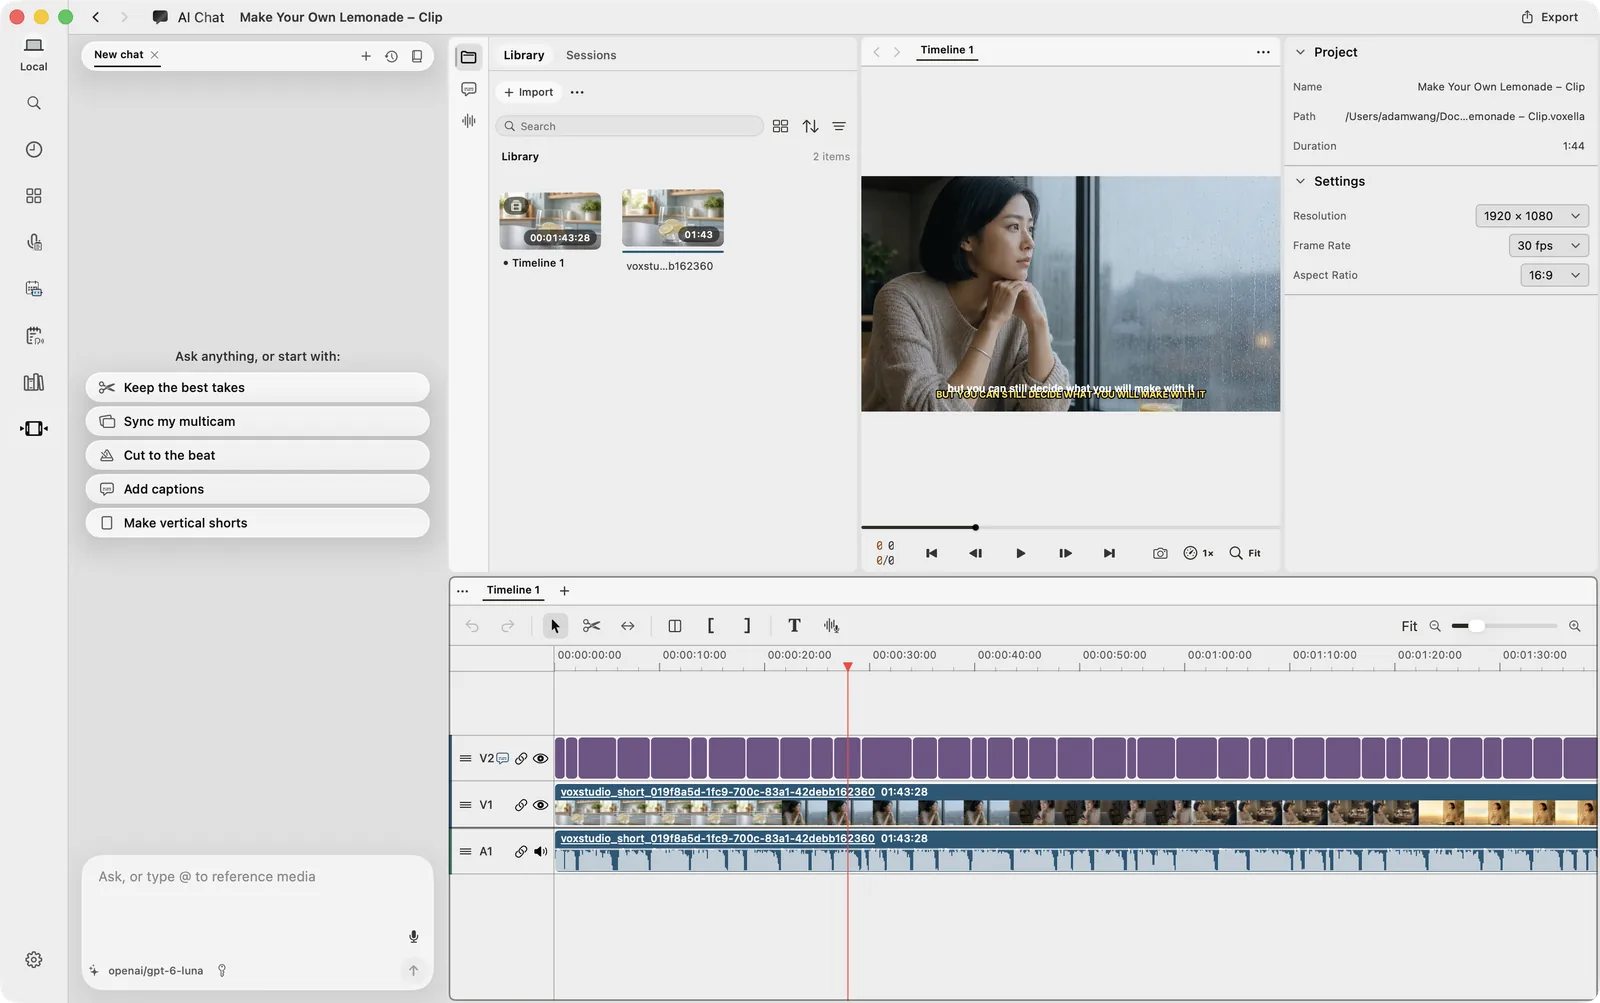
The editor: AI chat on the left, preview in the middle, a multitrack timeline below. Export where you want it
Export the finished video, or export transcripts and subtitles from the session. The files are saved on your Mac, so you decide what is shared and where.
What runs on your Mac, and what does not
| Runs on your Mac (after model download) | Uses a service or the internet | |
|---|---|---|
| Transcription & captions | Yes, with the Transcription & Captions model | Optional: you can choose VoxStudio Cloud for a task instead |
| Speaker identification | Yes, with the Speaker identification model | None needed |
| Dubbing (voiceover from a script) | Yes, with the Dubbing model and a reference voice | Optional cloud dubbing |
| Search by meaning and knowledge ranking | Yes, on-device models | Answers written by an AI model use your chosen AI service |
| Audio enhancement | Yes, background-noise reduction on this Mac | None needed |
| Translation, AI summaries, AI editing chat | Not local by default | A language model: VoxStudio's service or your own provider key |
| Sign-in, trial and purchase | Not applicable | Needs the internet. Lifetime access can stay valid offline for up to 30 days between online refreshes. |
What "offline" really means here
Local-first is easy to oversell. So, plainly: after you download the local models, recording, transcription, speaker detection, captions, local dubbing and the editor work without sending your media to a server. You can do a full record-transcribe-dub-edit pass on a flight.
Two things are different. First, steps that need a large language model, such as translation, summaries and the AI editing chat, send the necessary text to the AI service you choose, either VoxStudio's or your own provider, and that provider's policies apply. Second, signing in, starting a trial and buying a license need the internet. If your material is sensitive, you can stick to the local features and leave the AI service steps out; the local transcript and subtitles are still yours to edit and export.
Who this fits
Consultants and agencies who record client calls and cannot upload them to a third party. Researchers and journalists with interviews that must stay on a laptop. Teachers and course creators who turn a lecture into captions and a re-voiced version. Solo creators who want a transcript, a voiceover and a cut on one timeline without juggling exports.
It is not a replacement for a full finishing suite: expect a focused editor with a multitrack timeline, captions, effects and export, built around speech-driven video.
Getting the most out of a local-first setup
- Download once, on good Wi-Fi — Model downloads are the only large transfer. Prepare the features you need in Local Features before you travel, then work offline.
- Name sessions as you go — A title like "Acme kickoff, 10 Oct" turns the Sessions list into a searchable archive, and Search by meaning finds moments by what was said.
- Use voices you have permission for — Reference voices clone a real voice. Only use voices you own or are authorised to use, and tell your audience when a voice is synthetic.
- Keep sensitive work on the local path — For confidential recordings, use the local models and skip translation and summary steps, which call a language model.
- Tell people you are recording — Recording locally does not replace consent. Follow your company policy and local law.
FAQ
Does VoxStudio for Mac work offline?
Mostly. After you download the local models in Settings → Local Features, recording, transcription, speaker identification, captions, local dubbing and video editing run on your Mac without uploading your media. Sign-in, trials and purchases need the internet, and translation, AI summaries and the AI editing chat use an AI service.
Is my audio uploaded when I transcribe?
Not when you use the local models: local processing does not upload your media. If you choose VoxStudio Cloud for a task, or use features that call a language model, the necessary content is sent to that service.
What Mac do I need?
VoxStudio for Mac requires a Mac with Apple silicon (M1 or later) and macOS 15 (Sequoia) or later. Intel-based Macs are not supported.
Can I dub a video into another language?
Yes. Translate the transcript, then create the dub in the voiceover builder with a reference voice you have permission to use. Local dubbing generates the speech on your Mac, while the translation step uses an AI service.
Can I edit the video in the same app?
Yes. From a session, choose New clip to open the recording in the built-in video editor with its subtitles on a track, then cut, caption and export. Dub sessions can be dragged onto the timeline from the Sessions tab.
How is it priced?
There is a 14-day Mac trial with Free plan features, after which you can choose a Lifetime license or a subscription. See the pricing page for the current plans.
Try the local-first studio on your Mac
Download VoxStudio for Mac, prepare the local features you need and record, transcribe, dub and edit in one place. Download VoxStudio for Mac
David — David works on the VoxStudio product team and spends most days inside the video editor, turning real customer workflows into faster ones.